Free shipping on orders over $100

Shop online 24/7 · Orders ship Mon–Fri, 9 AM–5 PM

1-800-BarberSupply / EducationTools. Care. Style.

Know more. Choose well.

The right tools
can set you apart.

Simple guides to the tools you use.
Learn what to buy, when to use it and how to care for it.

From your first kit to your next blade, find clear answers for the work ahead.

Browse all eleven ↓
Save a guide for later. Your saved guides stay on this browser.

Your guide

01 / The Tool Issue

Clean lines start with control. Find the blade, grip and power setup that fit your work.

Back to Education ↑

Tools / The finishing cut

1-800-BarberSupply.com / EducationThe Tool Issue / 01

Tools / The finishing cut

Choose your next trimmer.

Clean lines start with control. Find the blade, grip and power setup that fit your work.

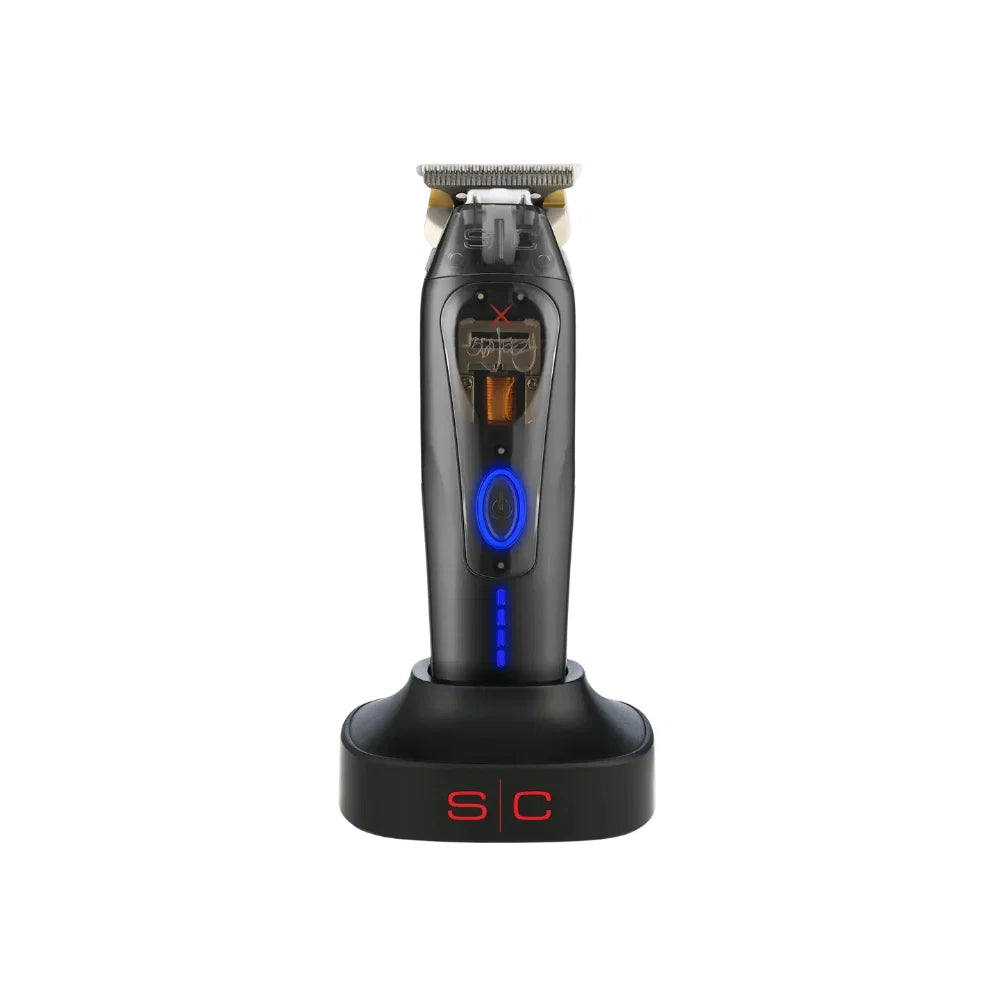
From our shop / StyleCraft 360 Jeezy Cordless Trimmer w/ IN3 Vector Motor (SC423B)

Look at the tool

Three things to check.

01

The blade

Can you see the edge as you work?

02

The grip

Does it feel firm without a tight squeeze?

03

The charge

How long does it run? How long to charge?

01

Start with the cut.

Think about the work you do most. Beard lines, necks and spots near ears all need a steady hand. A trimmer helps you reach those small areas. For a full haircut, start with a clipper.

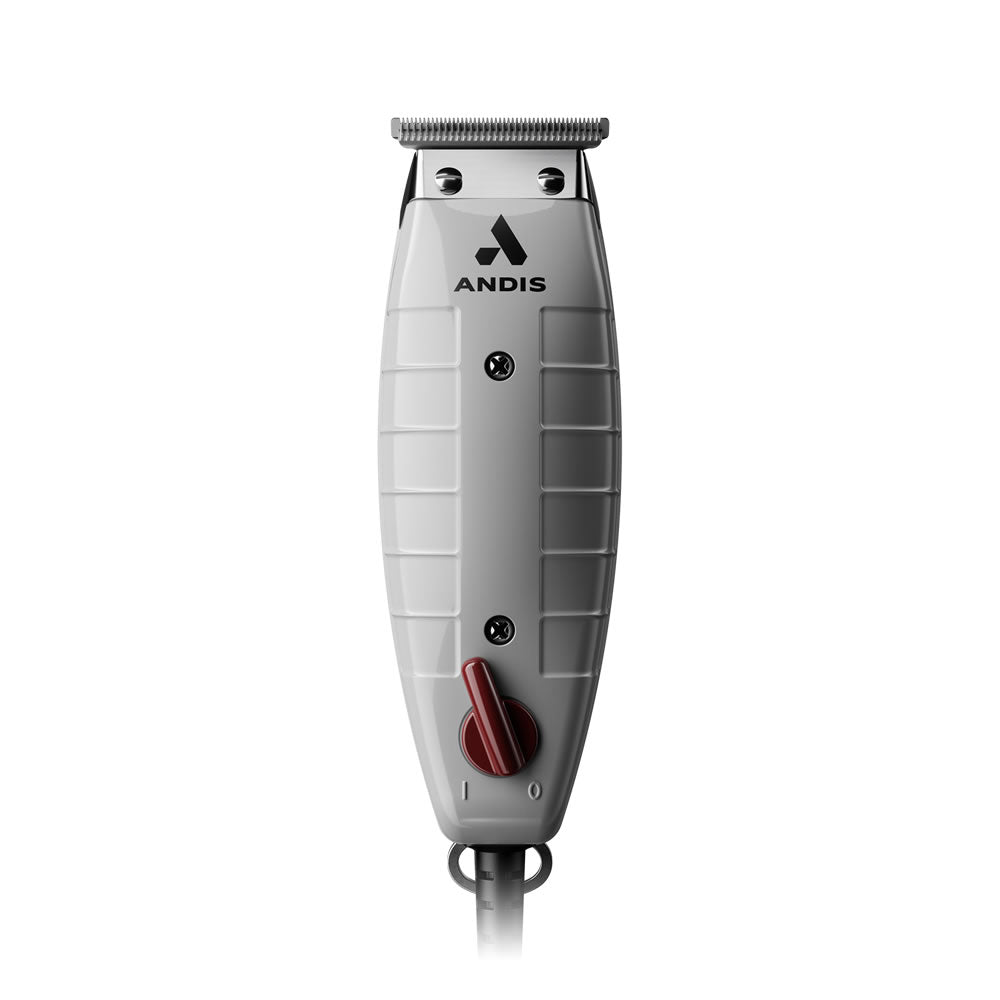
A T-blade is wider at the top. Its ends can help you reach tight spots. Look at the blade shape and how much of it you can see.

02

Check the grip.

Look at the weight, switch and shape of the handle. The tool should feel firm without a tight squeeze. A motor name alone cannot tell you how it feels in your hand.

If you can try the tool, hold it as you would during a cut. Can you see the edge? Can you reach the switch? Those small details count.

03

Plan the power.

Run time is how long the tool can run on a charge. It is not the length of your shift. Charge time is how long it takes to fill back up.

Check both. Also check if it works with a cord and which charger it needs. Don’t assume all cordless tools work while plugged in.

04

Make care part of the choice.

Check how to clean and oil the blade. Find the right part number for a new blade before you need one.

If your old trimmer pulls hair, stop and check it first. Cleaning, oil or a new blade may solve the problem. A higher price does not make a tool right for you.

05

Choose for the job you do most.

For crisp beard edges, look for a clear view of the blade. For small spots near ears, think about the corners and how you turn the tool. A wide blade is not always the easiest shape for every spot.

If you trim a beard to one length, check the guards in the box. A bare blade is for close work. It does not give you all the length choices of a guard set.

06

Before you order.

Write down the tool model, blade part and charger type. Check what comes with it: guards, oil, a cover and a charging stand may vary.

Read the return terms if you have not held it. Compare the weight and charge time with your current tool. Buy for a gap in your kit. A new motor name is not a reason on its own.
The takeaway

The right trimmer gives you a clear view and a steady grip.

Shop trimmers
1-800-BarberSupply.com / EducationThe Air Studio / 02

Styling / The air guide

A better way to choose a dryer.

Look at heat, air speed and the nozzle. Then think about how the dryer fits your hand.

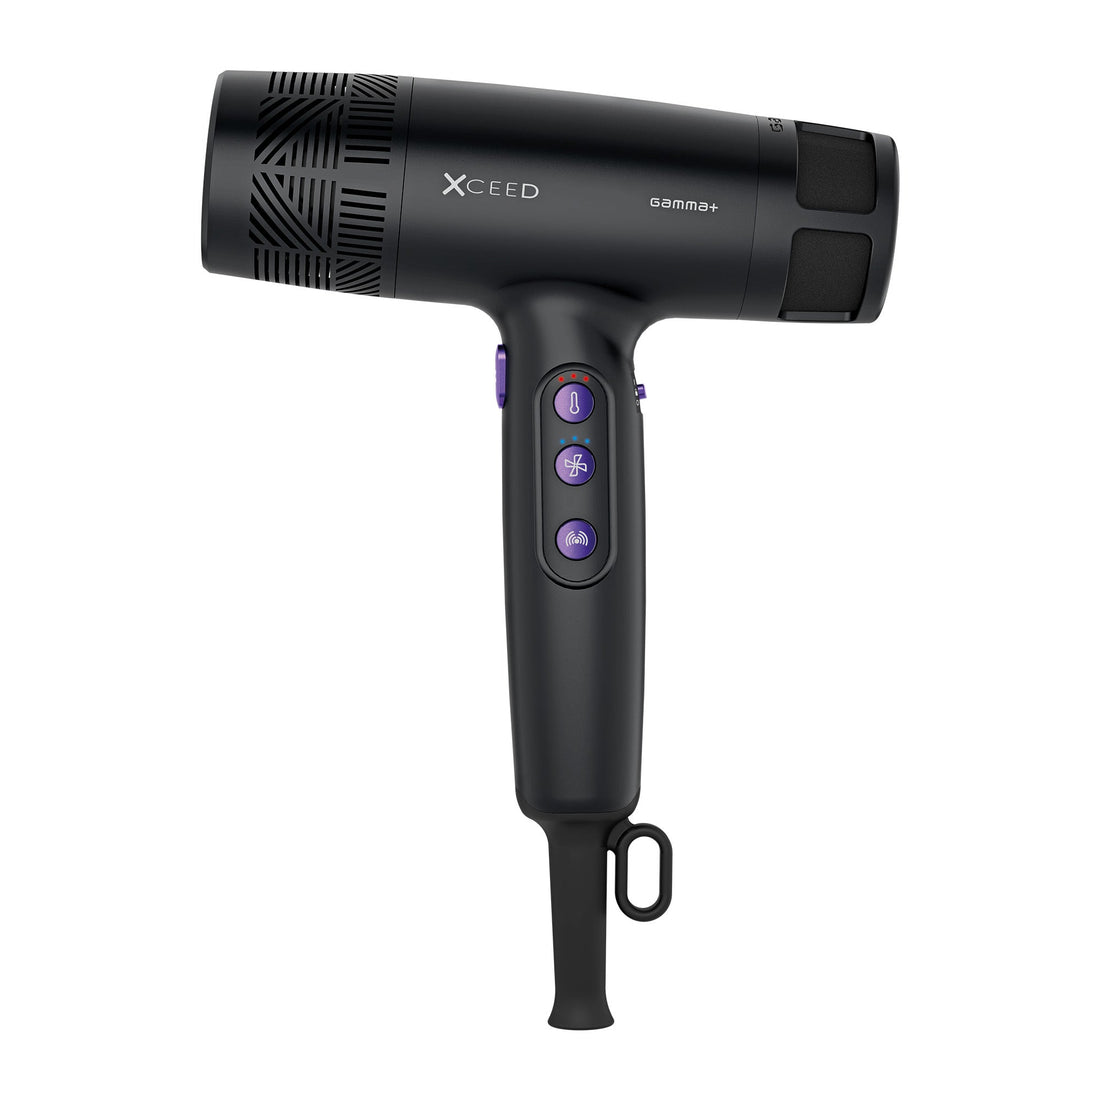
From our shop / Gamma+ Xceed Hair Dryer GP115B with Three No Frizz Brushes

Choose the shape. Choose the job.

Keep the curl.
Or aim the air.

Diffuser

For waves and curls.
Spread air to help keep their shape.

Narrow nozzle

For a brush blowout.
Aim air at one small section.

Simple attachment diagrams. Check parts made for your exact dryer.

Learn the controls

Heat is one choice.
Air speed is another.

Heat

Check the heat settings.
Follow the guide for your hair and task.

Air speed

Check how much control you have over the air.

01

Look beyond the power number.

The watt number is only one part of the tool. Check the heat and air speed settings, too. More heat is not the answer to every job.

Choose settings for the hair you are working with. Follow the tool guide. Keep the air moving rather than holding the dryer on one spot.

02

Choose the attachment for the result.

A diffuser and a narrow nozzle move air in different ways. That matters when you choose the style. Match the part to the job rather than using whatever comes in the box.

Check the heat and speed controls with the part in place. A high watt number does not tell you how gently you can dry curls or how well you can aim air.

03

Use a diffuser for waves and curls.

Want to dry waves or curls while keeping their shape? A diffuser is the bowl-shaped part for that job. It spreads the air, so the curls get less of a hard blast. This can help limit frizz.

Start with damp hair. Gently squeeze out extra water first. Use low air speed and low heat to start. Work in small parts. Rest curls in the bowl as the tool guide shows. Avoid stirring or pulling the hair as it dries.

04

Use a narrow nozzle for a brush blowout.

A narrow nozzle is also called a concentrator. Use it when you want to aim air at one small part of the hair. It helps when you use a brush to shape a smooth style.

The two parts serve different goals. Choose the diffuser to keep a wave or curl pattern. Choose the narrow nozzle for air you can aim. Check that the exact part fits your dryer. The pictured dryer is a shop example; it does not show every part you may need.

05

Think about your hand.

Weight, balance and where the buttons sit matter during use. Think about the way you hold the dryer and the space where you work.

Check the cord length. Look at where the cord joins the handle. The tool needs to suit your setup, not just the photo on the box.

06

Check the care steps.

Find out how to clear lint from the filter. Turn the tool off and unplug it before care. Follow the steps for that model.

Don’t block the air vents. Stop using a dryer with a damaged cord or an odd smell. Have it checked before you use it again.

The takeaway

Choose the controls and fit you will use every day.

Shop hair dryers
1-800-BarberSupply.com / EducationThe Finish Edit / 03

Hair styling / Pomade

Water or oil? Start here.

Two pomades. Two care routines. Choose the hold, shine and washout that suit your day.

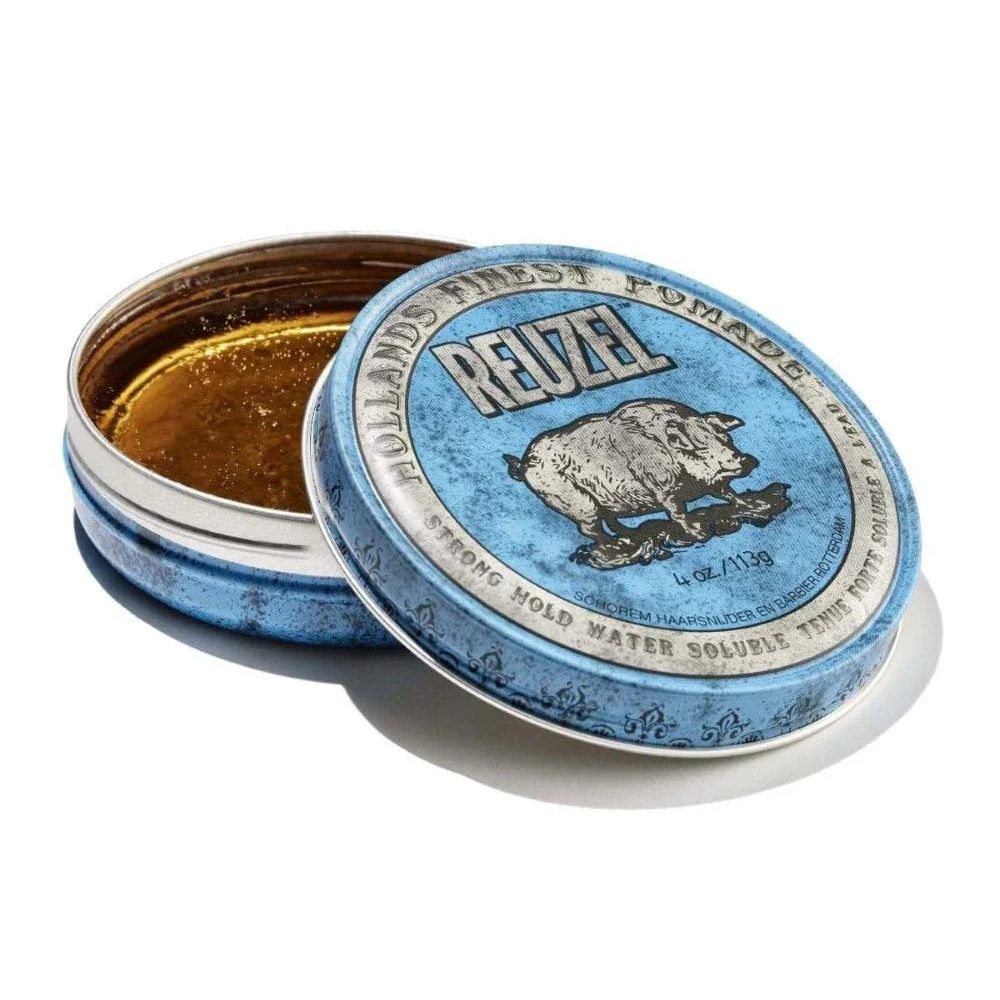
From our shop / Reuzel Blue Pomade 4 oz

Two examples from Reuzel

Read the tin. Choose the routine.

Reuzel Blue Pomade 4 oz

Water-based example

Blue Pomade

Strong hold · High shine
Made to wash out with water.

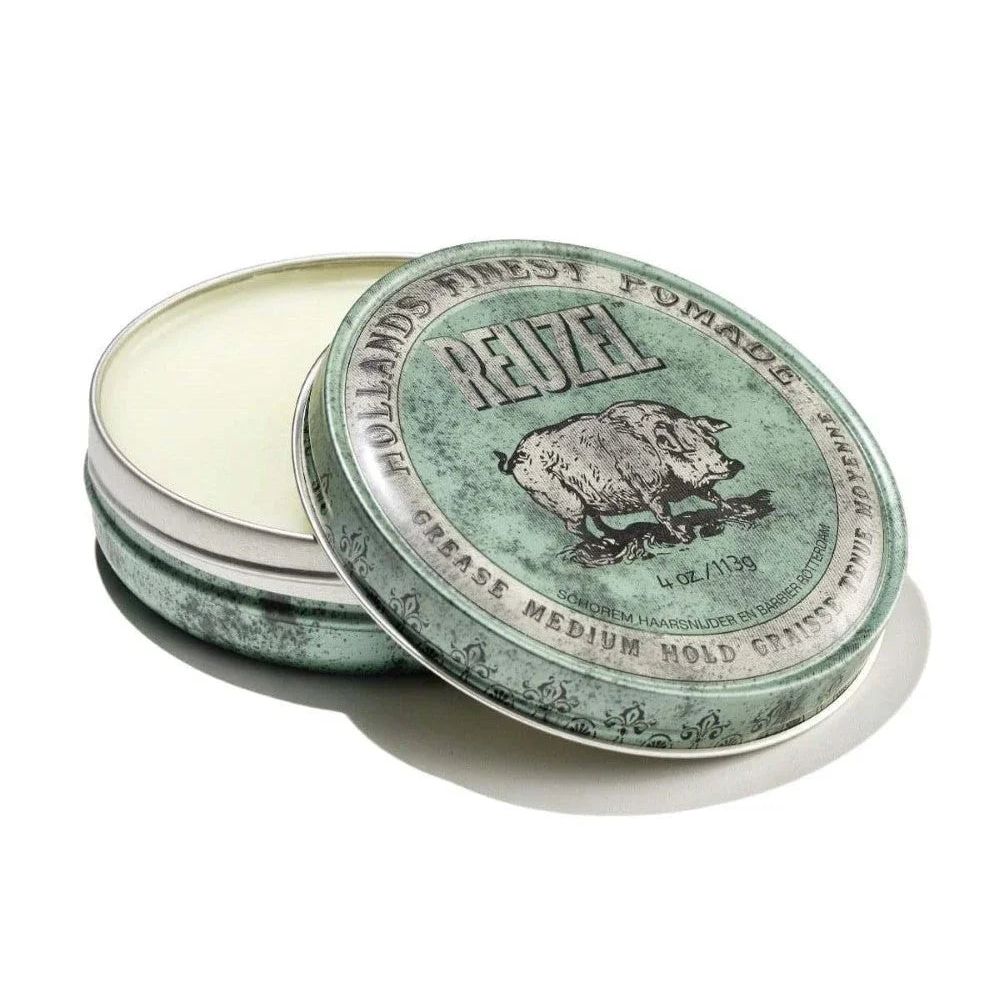
Reuzel Green Pomade 4 oz

Oil-based example

Green Pomade

Medium hold · Medium shine
Check the brand’s washout steps.

These are two products, not rules for all pomades.
CheckBlueGreen
BaseWaterOil
Listed holdStrongMedium
Listed shineHighMedium
01

Start with the finish.

Hold is how firmly the product keeps the hair in place. Shine is how glossy it looks. These are two separate things.

A strong hold does not always mean high shine. Read both on the label. Decide how you want your hair to look before you choose a tin.

02

Compare two real examples.

Reuzel Blue is water-based. The brand lists strong hold and high shine. It is an option to look at if you want that finish and a product made to wash out with water.

Reuzel Green is oil-based. The brand lists medium hold and medium shine. Read its washout steps before you choose it. These are two examples, not rules for every pomade.

03

Use less at first.

Follow the steps on the tin. Start with a small amount and spread it through your hands. Work it through the hair, then add more only if you need it.

Check if the brand calls for dry or damp hair. Changing that can change the finish. Keep your first try simple so you can learn what works.

04

Choose for your routine.

Think about when you wash your hair and whether you want to restyle it. The product should fit that routine.

Check the size of the tin, too. A small size can be a good way to try a new finish. Keep notes on the amount you used and the result.

05

Match the finish to your day.

Want a neat, glossy style with firm hold? Blue is one product to compare. Want the medium hold and shine listed for Green? Read its use and wash steps first.

Do not choose by tin color alone. An oil base does not mean every product has the same hold. A water base does not mean every finish is matte. The exact product label is the useful clue.

06

When the first try feels wrong.

If the hair feels heavy, use less on the next try. If the hold feels weak, first check the hair state and amount the brand calls for. Adding a lot at once makes it hard to tell what changed.

Use the wash steps for that product. If easy washout is your main goal, check it before buying. Try a small tin before you commit to a large one. Keep the amount and hair state the same when you compare two products.

The takeaway

Choose the finish first. Then check the washout.

Shop pomades
1-800-BarberSupply.com / EducationThe Cut Workshop / 04

Tools / Three jobs

Cut. Line. Finish.

A clipper, trimmer and foil shaver do different jobs. Here’s where each tool fits.

Know the job

01StyleCraft Saber 2.0 Professional Clipper | Orange | SC617O

Cut the length.

Clipper

02Andis T-Outliner Trimmer #04780

Draw the line.

Trimmer

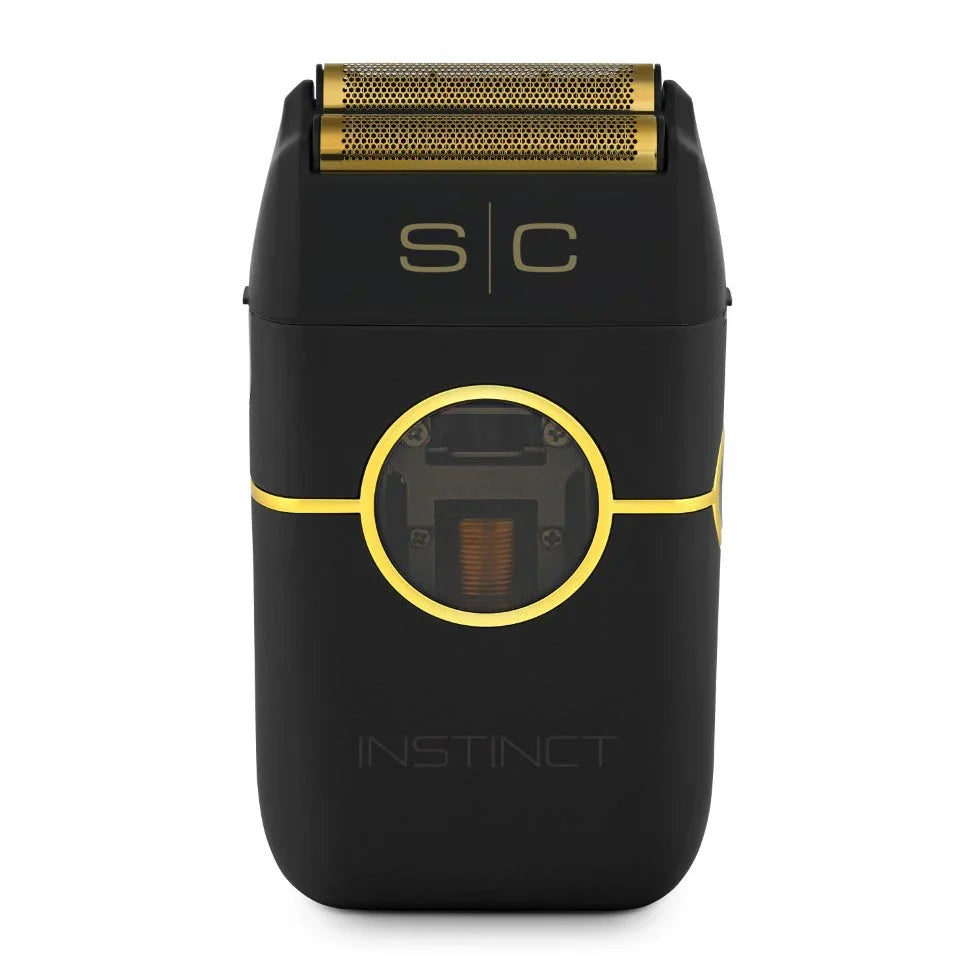
03StyleCraft Instinct Metal Double Foil Shaver – Black (SC807B)

Check the close finish.

Foil shaver

Product examples from our shop. Check each model’s guide for its use.

01

The clipper takes off length.

Use a clipper for the main cut. Guards help leave hair at a set length. On many models, the side lever makes small changes to that length.

A clipper with the right guard can also take length off a thick beard. Start longer when you are learning. You can cut more off, but you can’t put it back.

02

The trimmer shapes the line.

Use a trimmer for beard edges, necks and the area near ears. Its small blade helps you see where you cut.

Check which guards come with it. Don’t assume they fit another tool. Use a light touch near skin. Pressing harder does not make a line better.

03

The foil shaver has a close-finish role.

A foil shaver has a thin cover over its cutters. Check the model guide for the hair length and areas it is made to shave.

It is not the tool for taking off lots of long hair. Check the foil before use. Stop if it is bent, torn or damaged. Follow the maker’s skin and cleaning guidance.

04

Buy for the services you do.

For a full haircut, start with a clipper. Add a trimmer for the edges. A foil shaver may fit some close-finish services.

You do not need all three for every job. Choose the tools your work calls for. They do not have to come from the same brand.

05

Put the tools in order.

For a cut that needs all three, take off length with the clipper first. Shape the edges with the trimmer. Use the foil shaver only on areas and short hair that its guide allows.

A foil shaver cannot take the place of the main cut. Long hair needs to be cut down first. Skip the foil step when the service does not call for a very close finish.

06

Check the length before the cut.

Guard numbers can vary across tool lines. Read the listed cut length, not just the number. Check the length range of the bare blade and lever, too.

For a beard trim, keep a longer guard on hand. For a close finish, inspect the foil and cutter. Clean and care for each tool by its own guide. A shared brand name does not mean shared guards, chargers or parts.

The takeaway

Give each tool a clear job on your station.

Explore tool sets
1-800-BarberSupply.com / EducationThe Shop Plan / 05

Shop planning / Your first kit

Build your first station.

Buy for the services you plan to offer. Start with the tools you need, then fill the gaps.

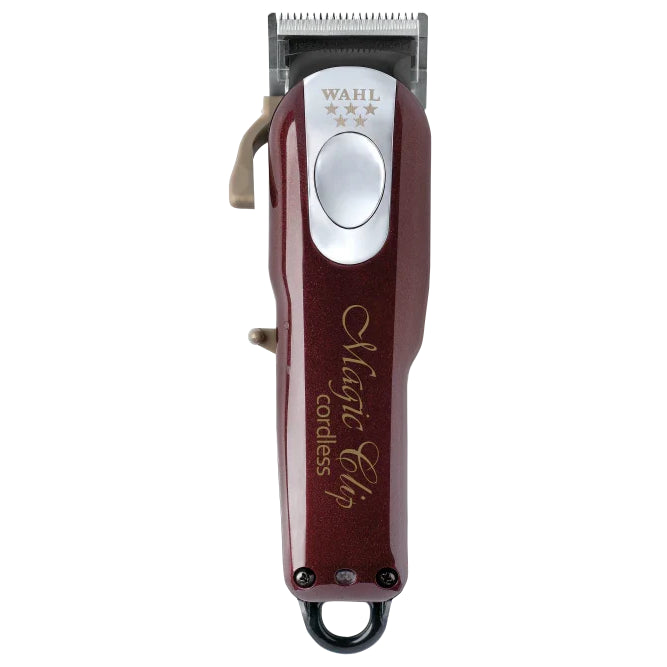
From our shop / Wahl 5 Star Cordless Magic Clip #08148

Your buying order

Need now.
Useful next.
Can wait.

Tick the items your services need. This list stays on this browser.

Your first-station list
01

Write the service list.

What will you do each day? Full haircuts, beard lines and styling need different tools. Write those jobs down before you shop.

For full haircuts, a clipper and guards are a place to start. A trimmer helps with the edges. Add other tools when you have a clear job for them.

02

Plan the whole station.

The main tools are only part of the list. Think about combs, brushes, a cape, blade care supplies and a place to store each item.

Follow your shop’s rules for clean tools and used tools. Read the labels for care products. Make room for the steps you need between clients.

03

Leave room for upkeep.

Find the part number for each blade, foil or cutter you may need to replace. Check the price of those parts before you buy the tool.

Include oil and the right cleaning products in your budget. A tool you cannot care for is hard to keep in use.

04

Buy in a useful order.

Split your list into three groups: need now, useful next and can wait. Start with need now.

Two tools with the same job may be less useful than one tool and the care supplies it needs. Add a backup when downtime would hurt your work. Review the list as your services grow.

05

Match the kit to the service.

Haircuts need a way to cut length and shape edges. Beard trims need length options and a clear view of the line. Blowouts need a dryer, the right parts and brushes.

A close-shave service may need a foil shaver. Read its use guide first. Start with the services you can offer well. Add each tool when you can name the job it will do.

06

Count the costs after the box.

List the tool price beside the price of its spare blade, foil or cutter. Add oil, cleaning supplies and any parts sold on their own. Check the warranty and repair path, too.

Think about charge points and dry storage. Leave space for clean tools and tools waiting for care. At the end of a week, note what slowed the work. Buy the next item to solve that gap. You do not need a second copy of every tool on day one.

The takeaway

Build around the work. Leave space in the budget for care.

Build your kit
1-800-BarberSupply.com / EducationThe Blade Manual / 06

Reference / Blade systems

Two blade systems. Know the fit.

Detachable and adjustable describe two setups. Check the exact model before you buy parts.

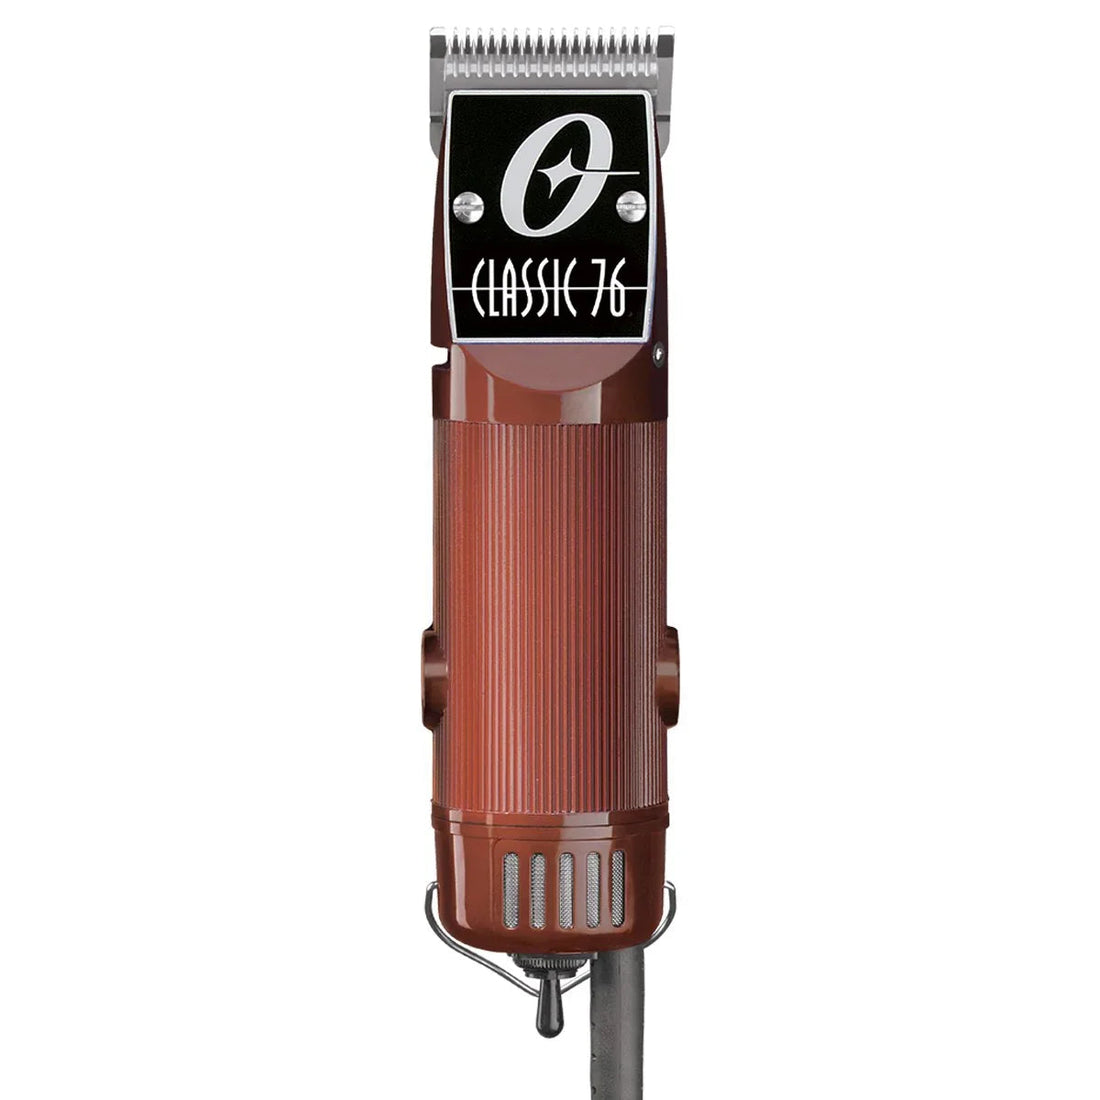
From our shop / Oster Classic 76 Professional Clipper + #000 & #1 Blades

A fit guide

How does the blade mount?

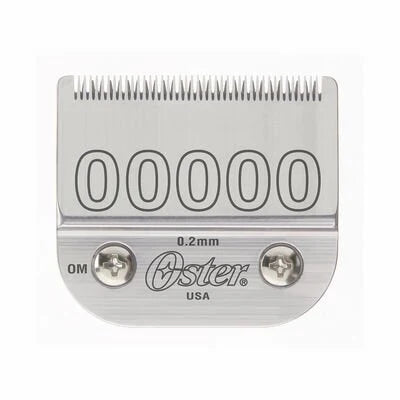
Oster Classic 76 Clipper Blades (12 sizes to choose)01 / Detachable

Swap the unit.

Shown: an Oster Classic 76 blade.
Choose a size made for your tool.

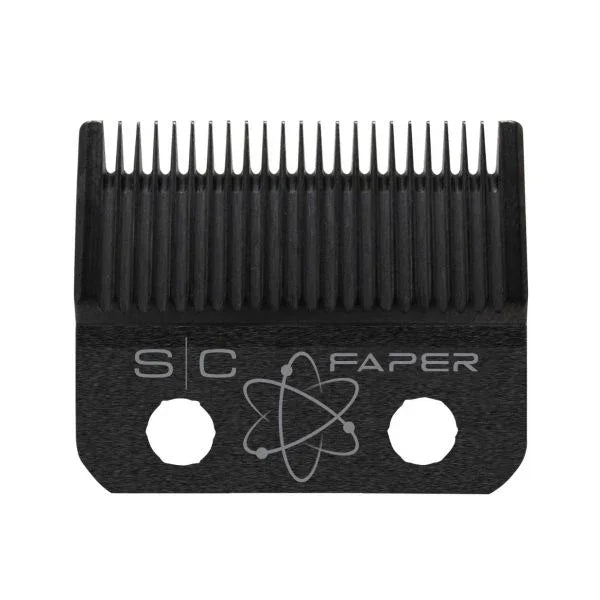
StyleCraft Faper Blade w/ Slim Deep Tooth Black Diamond Cutter #SC520B02 / Screw-mounted example

Check the part number.

Shown: StyleCraft SC520B.
The brand gives fit and alignment steps.

Check the model guide. These are system basics, not a universal fit chart.
QuestionDetachable systemAdjustable system
Change length?Blade size, and guards where allowed.Lever and guards, as the tool guide says.
Replace the blade?Match the blade family and tool.Match the exact replacement set.
Does DLC prove fit?No. It describes a coating.No. It describes a coating.
01

A detachable blade comes off as a unit.

On a detachable-blade system, you can swap the blade unit. Different blade sizes can leave different lengths of hair.

Check the tool guide for the right blade family. A blade that looks close may still be the wrong fit. Turn the tool off before a change and follow the maker’s steps.

02

An adjustable setup often uses a lever.

On many adjustable clippers, the lever shifts the blade to make small changes in cut length. Guards add more length choices.

When replacing the blade, check the exact part number. Some sets are held on with screws and need careful alignment. Follow the guide before you turn the tool on.

03

A blade size is not a guard size.

Numbers on blades and guards do not always mean the same thing. Use the brand’s length chart. Check the length in millimeters if it is listed.

Our Oster blade listing has several size choices. Pick the size you need from the options menu. One order gives you the blade in that selected size.

04

Fit and coating are separate facts.

DLC is a blade coating. It does not tell you how the blade mounts to the tool. A detachable blade can also have a coating.

Check fit first. Then compare cut length, blade shape, coating and care. A familiar brand name alone does not prove a part will fit.

05

Choose a system for the way you work.

Want to switch between blade units with set cut lengths? A detachable system may suit that routine. Want small length changes from a lever during a cut? Compare an adjustable clipper.

The system is only part of the choice. Both can have guard options where the maker allows them. Check the full length range and how each tool feels. Neither system makes every cut better on its own.

06

Use this check before buying a blade.

Find the full model name on the tool. Open the maker’s fit list. Match the part number, cut length and parts in the box. Does the listing sell a whole set or just a cutter?

Check the steps for mounting and alignment. Keep those steps with the tool. If the fit list does not name your model, ask before you order. A photo, a matching screw hole or the word DLC is not proof of fit.

The takeaway

Match the blade to the exact tool, not just the brand.

Shop clipper blades
1-800-BarberSupply.com / EducationThe Care Routine / 07

Tool care / Between clients

Clean. Disinfect. Oil.

Each step has a job. Use the right products and give the label’s directions their full time.

The three jobs

01

Clean

Remove hair and dirt.

02

Disinfect

Use the label’s full wet time.

03

Oil

Follow the tool’s oiling steps.

A cooling spray may not do all three jobs. Read the product label.

From our shop / Wahl Senior 2.0 Cordless Barber Clipper #3027990
01

Start by clearing the hair.

Turn the tool off. Unplug it if it has a cord. Brush hair from the blade teeth after each cut.

Only remove the blade if your tool guide shows you how. Keep the tool body out of water and blade wash unless the maker says otherwise.

02

Read the disinfectant label.

Disinfect means to use a product that kills germs. Choose one made for the surface and use you need. Follow its label and your shop’s rules.

The label tells you how long the surface must stay wet. This is called contact time. Give it that full time. A quick spray and wipe may not be enough.

03

Give oil its own step.

A spray that cools a blade may not disinfect it. A disinfectant may not take the place of blade oil. Read what each product is made to do.

Use the oil your tool guide calls for. Follow its steps for where to put the drops and how to spread them. Wipe away the extra oil.

04

Check before the next cut.

Don’t use a hot blade on skin. Stop using one with a bent or broken tooth. Check a tool that still pulls after cleaning and oiling.

Store the tool dry with its blade cover on. This guide is a reminder. The tool guide, product label and local shop rules give the steps you must follow.

05

Give the wet time room in the routine.

Contact time is the time the label says a surface must stay wet. Read it before the next client sits down. If the surface dries too soon, follow the label’s steps to keep it wet for the full time.

Clean visible hair and dirt first. Use the mix, surface and use method on the label. Do not guess a time from another spray. Do not mix care products unless their labels tell you to.

06

Know when to stop.

Cleaning cannot fix a broken tooth. Oil cannot fix a torn foil. Set damaged parts aside and find the correct replacement. Let a hot blade cool before it touches skin.

Before the next cut, check for hair left in the teeth, excess oil and damage. Follow the product’s dry or rinse steps, then the tool’s care steps. Keep clean tools away from used tools. Follow local shop rules for the full care routine.

The takeaway

Three jobs. The right products. The full label time.

Explore shop essentials
1-800-BarberSupply.com / EducationThe Finish Finder / 08

Your hair / Your choice

Find your finish.

Start with the look you want. Then check hold, shine and how the product washes out.

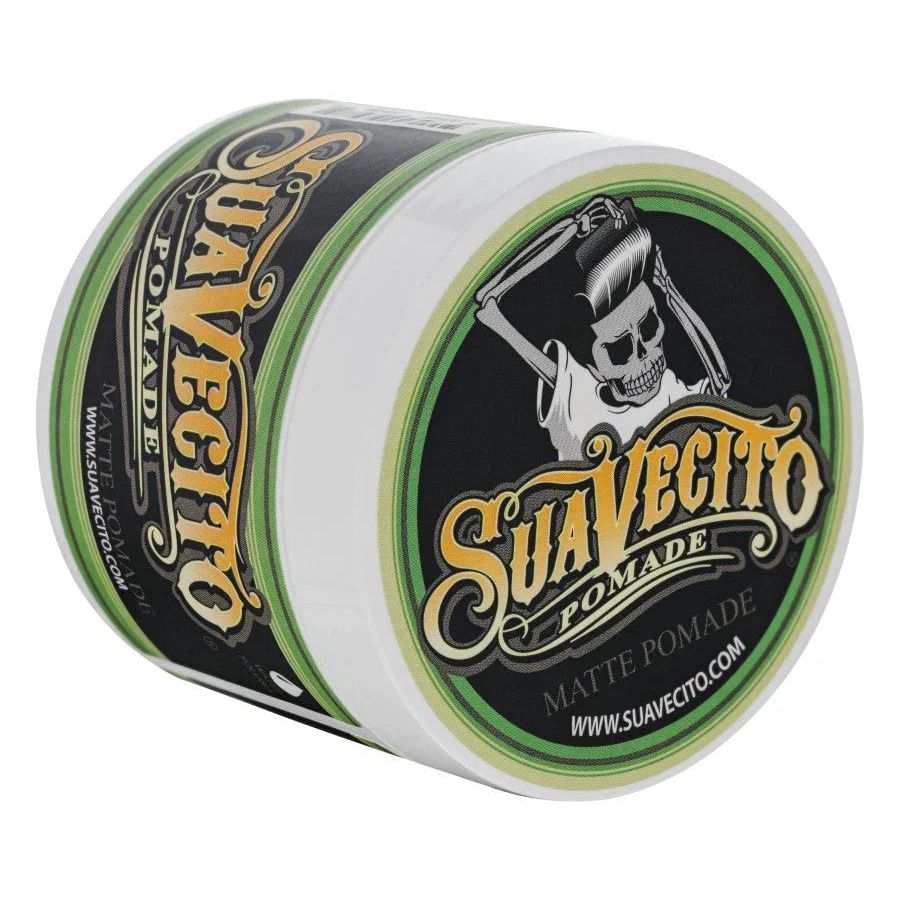
From our shop / Suavecito Pomade - Matte 4 oz

Start with your look

Which finish
sounds like you?

Choose a goal to see what to look for on the label.

Look for “matte” or low shine. Then check the hold. A matte finish can still have a strong hold.

Three label checks

Hold · Shine · Washout

01

Name the look.

Do you want a glossy finish or a low-shine look? Do you want firm hold or room for the hair to move? Start with those two questions.

Matte means little shine. It does not tell you how strong the hold is. Look for both hold and shine on the label.

02

Use product names as a starting point.

Pomade, clay, cream and gel are useful names, but they do not tell the whole story. Two products with the same name can have different finishes.

Read the brand’s details for the exact product. Check the hold, shine and whether it calls for dry or damp hair.

03

Think about washout.

Shown here: Suavecito Matte Pomade. The brand lists medium hold and no shine. It calls for dry hair for a true matte look. This is one option for a natural-looking finish.

Check how the product comes out of the hair. Use the wash steps for the exact product you pick. The base alone does not tell you everything about hold or shine.

04

Try a small amount.

Follow the label. Start with less, spread it well and add more only if needed. Too much can make it harder to learn what the product does.

Note the amount, whether your hair was damp and how the finish looked. Change one thing on the next try. A small tin can help you test a new routine.

05

Turn your goal into label checks.

For a neat, glossy style, check shine and firm hold. For a loose, low-shine look, check matte or low shine, then a hold level that suits your plan.

Want to run a comb through the hair later? Read the brand’s restyling steps. Do not assume a cream is light or a clay is strong. Use the exact product details to narrow the choice.

06

Make the first try easy to judge.

Choose one product and follow its dry or damp hair steps. Use a small amount. Check the look, feel and hold later in the day. Note how it washes out.

If the hair looks flat, try less next time. If the shape will not stay, check the use steps before you buy a stronger hold. Change one thing per try. A clear note tells you more than buying three new tins at once.

The takeaway

Choose the look first. Let the label guide the product choice.

Find a styling product
1-800-BarberSupply.com / EducationThe Material Brief / 09

Materials / A closer look

What is your blade made of?

Steel, ceramic and DLC name different things. Read the part details before you compare blades.

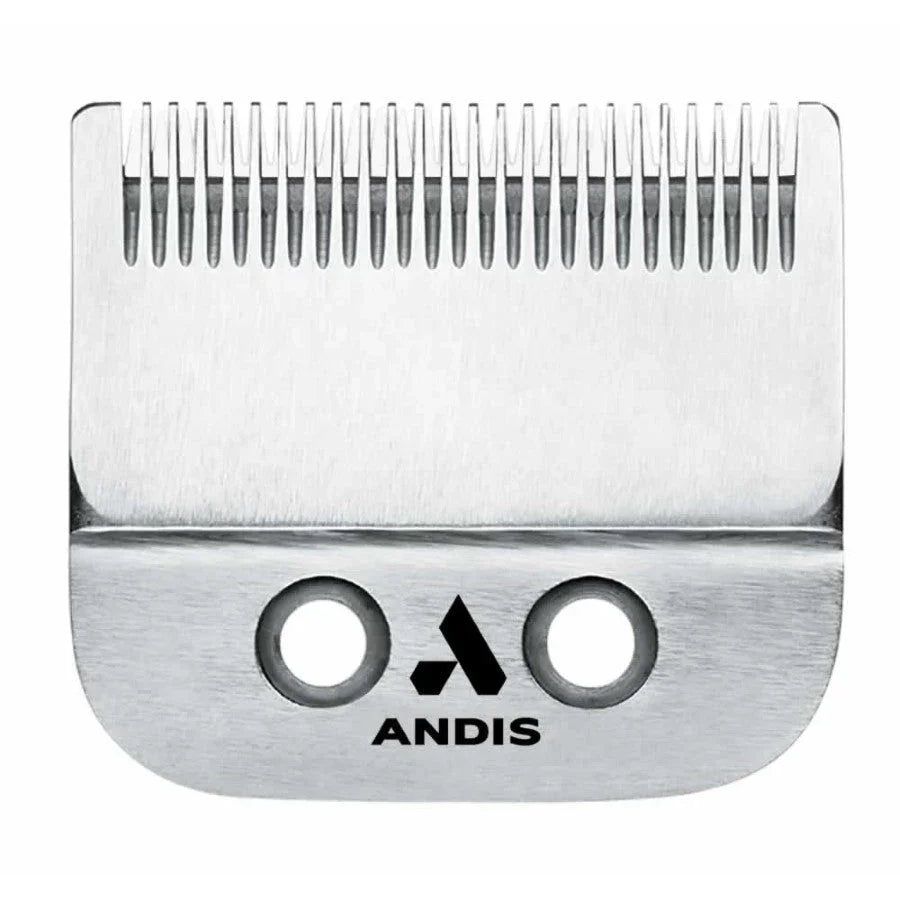
From our shop / Andis Master Ceramic Replacement Blade #01810

Read the parts

A material and a coating
are different facts.

01 / Base material

Steel

Read which blade part is made from it.

02 / Cutter material

Ceramic

Check which cutter and tool it fits.

03 / Surface coating

DLC

A coating on a blade. It does not prove fit.

Simple material diagrams. They do not show a specific blade or its true thickness.

Read the whole set, not just the short name.
Read thisAsk this
Fixed bladeWhich material or coating does this part use?
Moving cutterDoes the set include it? What is it made from?
Part numberWhich exact tool does this set fit?
01

Start with the blade parts.

A blade set can have a fixed blade and a moving cutter. They work together to cut hair. The two parts may use different materials.

Check which part a product claim describes. Is it the fixed blade, the cutter or both? A short name on the box may leave that out.

02

Know what DLC means.

DLC means diamond-like carbon. It is a coating on a blade. It is not a blade mounting system.

For example, StyleCraft lists Black DLC for both parts of its SC520B set. The brand also gives fit and care steps. Read those details for the exact set.

03

Know what ceramic tells you.

Ceramic names a material, not a cut length. The Andis 01810 set shown here has a ceramic moving cutter and a steel lower blade.

This set is made for the corded Andis Master ML. It is not the set for the cordless Master MLC. Check the exact part number. A ceramic cutter is not a part you can add to every blade.

04

Compare facts you can check.

Start with fit, cut length and which parts are included. Then look at the materials and care steps.

Claims about heat or how long a blade stays sharp need evidence for that model. A coating name alone cannot promise the result of a cut. Keep the blade clean and follow the oiling steps.

05

Read a blade listing in order.

First, find your tool on the fit list. Next, check the cut length and blade shape. Then check what the box holds: a fixed blade, a moving cutter or both.

Only then compare the material or coating. A DLC-coated steel part is still a steel part with a coating. A ceramic cutter may be paired with another material in the same blade set. Read each part on its own.

06

Ask what the claim means for your work.

If a brand says a blade runs cooler, ask what it was compared with. Look for details for that exact part. Do not turn a claim for one model into a promise for all ceramic or coated blades.

Fit and care still matter. A fancy material cannot fix the wrong cut length or a poor fit. Keep a record of the part number you bought. When it is time for a new part, that number is more useful than the color of the blade.

The takeaway

Read the part, the material and the fit as separate facts.

Compare blade options
1-800-BarberSupply.com / EducationThe Considered Buy / 10

Better buying / Repair or replace

Keep the tool that works.

A new blade may be all you need. Check the problem before you replace the whole tool.

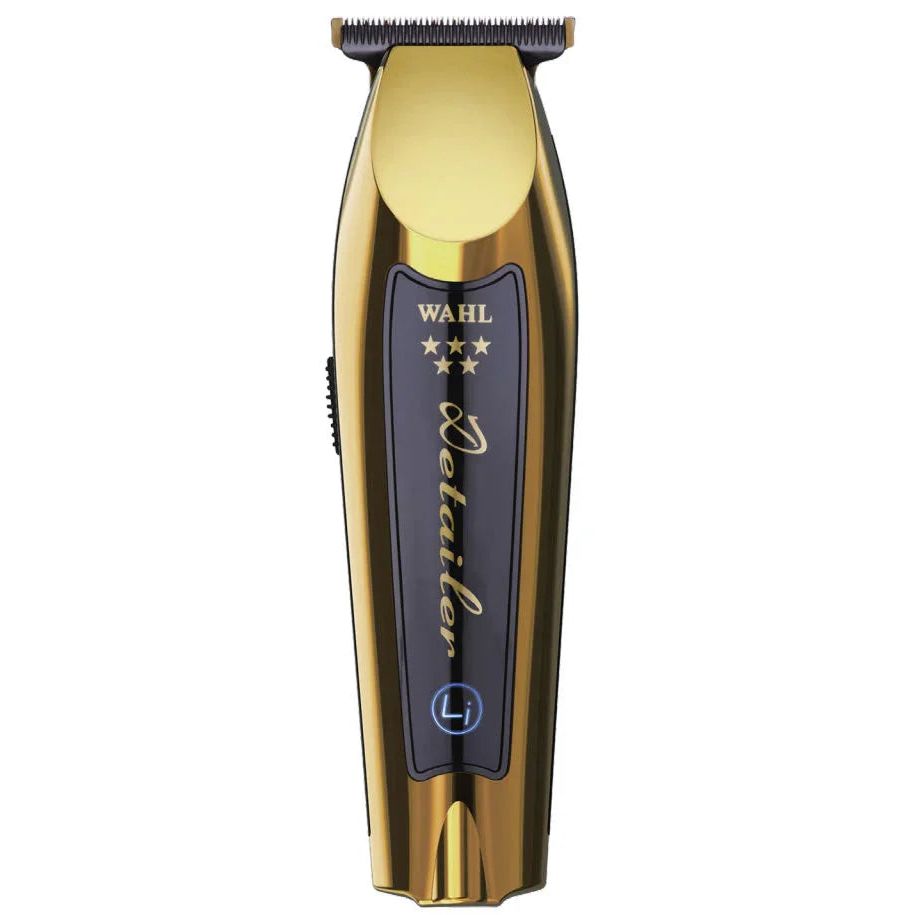
From our shop / Wahl 5 Star Cordless Detailer Li Gold Edition #8171-700
01

Start with what changed.

Did the tool pull hair? Did the blade get hot? Did it stop holding a charge? These are different problems. A new blade will not fix every one.

Stop using a damaged tool. Note what happened and when it started. That can help you find the right next step.

02

Check the blade first.

Hair or a dry blade can affect the cut. Follow the cleaning and oiling steps for your tool. Look for a bent or broken tooth.

If the blade needs replacing, match the exact part number. Check what the set includes. Some listings sell one part; others sell a blade and cutter together.

03

Know when to get service.

If the tool still gets hot, pulls or runs poorly after care, have it checked. Follow the maker’s service and warranty steps.

Don’t open the tool body or try an electrical repair without the right training. A charge fault may need service rather than a new blade.

04

Compare the whole choice.

Look at the price of the part or service, what your current tool does well and the work you need it to do. No one answer fits every tool.

If it cuts well and suits your hand, keeping it can make sense. If your needs have changed, a new tool may have a clear job. Buy with a reason you can name.

05

Separate a blade issue from a tool issue.

Hair pulling may call for cleaning, oil or a blade check. A bent tooth or torn foil needs the right new part. Stop using damaged parts while you find a match.

A tool that will not charge needs a different check. Follow the maker’s charger and service steps. A new blade will not fix that fault. Do not open the tool body unless its guide allows the task.

06

Compare repair with replacement.

Check the cost of the correct part and the repair service. Look at the warranty before paying for work. Think about the time the tool will be out of use.

Replace the tool when repair is not a sound option or it no longer fits your work. Compare parts, care and service support on the new choice. Keep a working old tool as a backup only if it is safe and suits the job. Follow local rules when you dispose of batteries or tools.

A clear next step

What needs to change?

  1. 01

    Hair or a dry blade?

    Follow the cleaning and oiling steps.

  2. 02

    A damaged blade?

    Stop using it. Find the exact replacement.

  3. 03

    A fault that remains?

    Follow the maker’s service steps.

A new blade does not fix a charge or electrical fault.

The takeaway

A good upgrade solves a clear problem.

Find replacement blades

Order support

Track your order

Swipe right to close →

Follow your order from the moment it is received through preparation, shipping, and delivery.

Recognition happens automatically as you type. No selection is required.

Enter an order or tracking number above.

Your cart

Swipe right to close →

Loading your cart…